Creative vacatons

Creative vacatons

Saturday, 14 September 2024

Noruega es un lugar increíblemente special!

Hace 16 años fundamos esta pequeña compañía de turismo en Tromsø. 


Como dos artistas visuales apasionados por la naturaleza, Vidar y yo ( Silvia) no imaginábamos el increíble viaje que comenzaríamos. Decidimos mantener la empresa pequeña para ofrecer una experiencia íntima y auténtica, conectando a nuestros clientes con el lugar, la historia y con nosotros mismos.


A lo largo de estos años, Tromsø ha crecido como destino turístico, y nos enorgullece ser uno de los operadores locales que ofrecen experiencias personalizadas, especialmente en la caza de auroras boreales.


Nuestro equipo de guías es uno de nuestros mayores logros. Nos aseguramos de que estén altamente capacitados no solo en fotografía y clima, sino también en historia y cultura local, transmitiendo siempre el respeto por la naturaleza que nos rodea.


Noruega es un lugar increíble, y cada vez que viajamos apreciamos más la belleza de nuestra tierra. Queremos invitar a quienes nos visiten a disfrutar no solo de nuestros tours, sino también de la tranquilidad y la belleza de Tromsø.


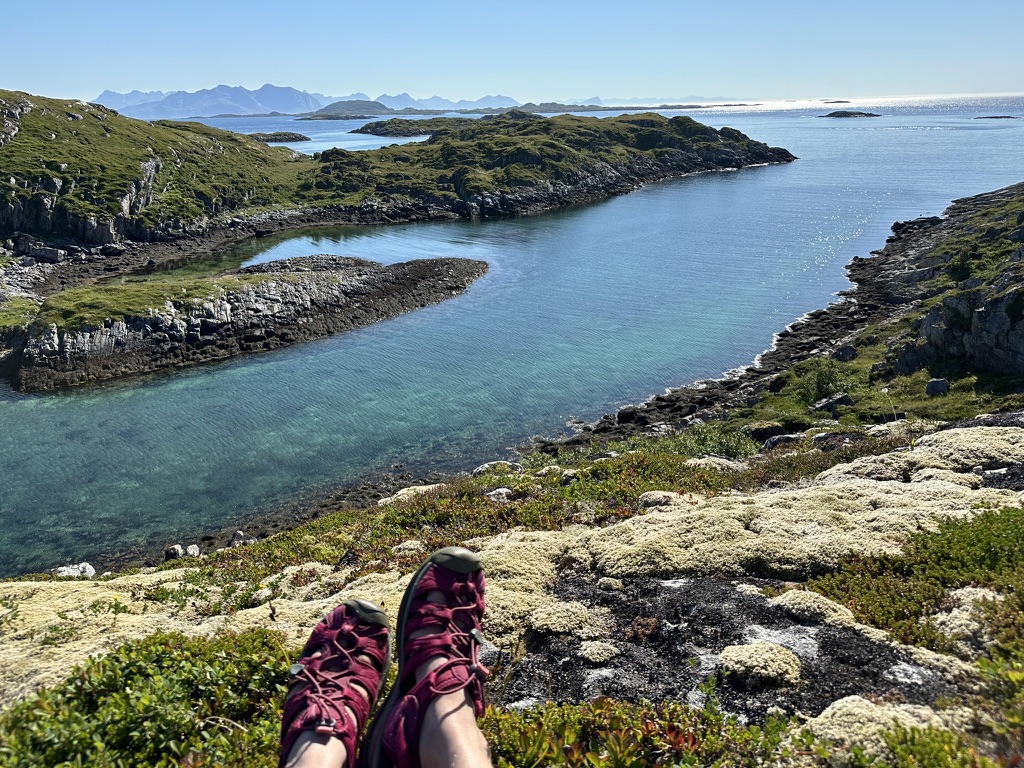
Les compartimos algunas fotos de nuestro verano pasado, un verano excepcional en Tromsø. Tanto Vidar como yo aprovechamos cada oportunidad para estar al aire libre y disfrutar del buen clima y el calorcito. La naturaleza sigue siendo lo que alimenta nuestra alma, ¡y es fácil entender por qué!


Nos vemos en la temporada de invierno 2024-2025, con guías en español, francés e inglés.


Thursday, 15 September 2022

Silhouette

I like to give myself a little assignments. Something a little different. Something that isn't strictly necessary on the tours. Something to explore and play with. In the past I've been making panorama stitching, time lapses and of corse my all time favorite; lonely trees (more on that on another blog post). 


Even though I've been making photos with human silhouettes for a number of years. I really started to make them on a regular basis last year.  I find them to be a nice add to the usual portraits that I normally do. 


A good thing is that it's not easy to see who it is on the photo. That leaves more to the imagination of the viewer. The viewers can imagine themselves in the photo. As a trip they want to do in the future or a trip they've done. I'm not much into doing selfies. But as photographers the most patient and understanding model is often ourself. And when I do silhouettes I feel that I can use myself as a model without the photo being about me. 


That leads me to the next question: If you can't recognize the person on the photo, is it still a portrait? 
Or, is it a landscape picture with a person in it? 


The thing is; It can be either or. Let me explain. For me a portrait is not just a photo of a person. It's a contract, it's an activity and it's an arrangement. A portrait is a photo of a person who has agreed with the photographer to be taken a photo of. The main thing that is happening in the photo is that the person is being photographed. The person is in some way posing for the photographer. 


If the photographed person is just looking at the landscape and, a photographer comes along and take a photo of her while she's there, it's not a portrait. Even if the person agrees to have her photo taken. Because the main thing that is happening is her looking at the view. The same thing goes for sports photography. The players at a football match know I'm there taking photos of them. But, the main thing happening is the match. 


So back to the silhouettes, it depends if the person(s) are posing for the photo or not. In most cases they are. Otherwise chances are that they would move on the long exposures that we use for Aurora photos. 


So my definition on what a portrait is, is based more on philosophy than what the actual photo may look like. You may disagree with me. Please do. And let's discuss it around the bonfire on a tour. Or in the comments if you prefer that. 

Photo: Melle Leyten

Monday, 11 October 2021

Fall 2021 - So Far

October 1st, 19:06


After a crazy year and a half things are finally starting to look like something normal. The winter of 2020 we had something called a solar minimum  so there was less Auroras than usual. Now the solar activity is picking up again and we’re looking forward to guests being able to visit us again and go chasing again. 


September 15, 23:49


September and October are great months to visit Tromsø and to see the Northern Lights. They are also the best months to see and to take photos of the Milky Way. 

September 15, 23:21

September 28, 20:56

September 29, 21:08

October 1st, 21:06


We hope to hang out with you on beaches, on the tundra and every dark place in between where we can see, enjoy and take photos of the Aurora and the starry sky. And of you under them.


October 1st, 21:17

October 3, 01:00


And we hope for many opportunities to see the lady dancing and dancing. We need more dancing this year. 

September 15, 23:50

September 15, 23:54

September 28, 23:14

September 28, 23:32

September 28, 23:32

September 30, 01:18


We have had our first trip over the border into Finland. As usual we found a starry sky and Aurora and while it was rainy and cloudy on the coast. 


October 10, 23:10


Sunday, 27 October 2019

Fisheye Schizophrenia

Every time I pull out my fisheye lens my mind goes into schizophrenia. One part says: "This will be great!" and, another part says: "Fisheyes are overused, the images look cheesy and lensy and the effect is cheap and over-used!"

My teacher at Concordia University Mark Ruwedel, a distiguished landskape photographer and a fantastic teacher, didn't like images that looked "lensy." 

Sorry Mark. Sometimes I must be allowed... 


Or do you prefer this one that is shot with the narrower 14mm lens? 

Monday, 26 November 2018

Will there be colours?


There will be colours!


«Will there be colours?» 
or variations like
«Will there be more colours?»
«When will there be colours?»
Is one of the most common questions.

And, as tempting as it is to say:
«There are only colours on the VIP-tours,»
and then move on.  But I’ll try to go into it. 

We have all seen these pictures of the Aurora where the green is super-green and, there is red and magenta and pink and purple and yellow. And then the elderly lady from India who is sitting inside the bus because it is so cold outside finally puts down the iPad and comes out to see the Aurora can only see a white cloud looking thing in the sky. 

Colours in the Aurora

There are different colours in the Aurora. Green is the most common and it's caused by plasma (gazes and particles from the sun) hitting oxygen 100 km to 200 km from the surface of the earth. Red is second most common and, is also caused by oxygen, only higher up in the atmosphere. Pink is caused by nitrogen below 100 km. And, lastly the most rare is blue caused by nitrogen ions above 100 km.  

Human Eyes Are Bad at Seeing in the Dark. 

The first thing that we lose is the colour vision. There are two light sensitive organs, photoreceptors, in the back of our eyes: Rods and cones.  Shortly one can say that the rods are do not see colours but, give us night vision and side vision. Cones gives us colour vision and senter vision. The result is that we cannot see colours that well in the dark even if they (the colours) are there. This is manifested in proverbs in several languages:
Norwegian: «I mørket er alle katter grå.»
German: «Nachts sind alle Katze grau.» 
Spanish: «De noche todos los gatos son pardos.»


Even if we CAN see in the dark it takes time to get used to it. There is a muscle in our eyes called the iris sphincter muscle that has to relax and open up so that the light can come through the iris and into the rods and cones so that we can see the little light that is out there. 

As a photography student, I spent a large portion of my time at university in the darkroom. I remember how it would take at least 30 minutes to really  get used to the dark. And the only thing that helps is being in the dark.

On top of that we also know that the night vision gets worse as we age. 

A Camera Sees the Colours That Are There

Different cameras have different sensors and records colours differently 
Different brands and, different models within the same brand will record the same scene with different colours. 
As a Canon user for many years I know that Canons are particularly sensitive to red. So much that I often have to reduce the saturation of red when I take photos of other things, like people. (Especially sunburned Northern-Norwegians). Red is also the first colour that we lose in the dark. 

Then there is the question of white balance.

If you take your photos in jpeg and auto white balance, you still have to make choices of which picture style to choose. So it is not so easy as to «just take a photo of what you see and, not changing it in the computer after.»

To illustrate my point I will show two photographs in three different versions. I will not post a photograph to illustrate «this is what we saw with our eyes.» The reason for this is that peoples night vision varies. And, I don't know what screen you are using to read this blogpost. For example if you are using a Samsung phone, the colours will be stronger and more saturated than they are on my Eizo computer screen. 

This is straight out of the camera.

This is how I interpreted the scene. 


These are the basic changes that I made. Most importantly changing the white balance a little compared to how I shot it. Then I added some contrast by making the darkest tones darker (lowering Black) And I also reduced the saturation.

The «biggest sinner» in post production is probably Dehaze.

Here is a version of the same photo where I've only pulled the Dehaze.

Dehazed in Lightroom. This is NOT what it looks like!


As you can see colours like purple, magenta or red is popping out. 
If this is what you are expecting you will be disappointed. 


Corona example
This is straight out of the camera.
This is how I interpreted the scene. 


As you can see the changes I've made are quite similar. I've increased the contrast in the same way. The saturation is decreased only in two colours.
Dehazed and added saturation in Lightroom. This is NOT what it looks like!


As photographers and humans we like to impress. We mostly show photos from the nights with the strongest Aurora. It can be tempting to overdo it in Lightroom. Sometimes the Aurora is strong and YES we can see many colours. Sometimes she is shy and doesn't want to show herself much. People are different. Some see colours where others don't. 


Conclusion:
Take photos in RAW and don’t overdo it in the post processing.
Stay out in the dark without looking at any light sources for a long time. 
Be happy with the Aurora you can see. 
Eat Silvia’s vegetable soup to get those carrots that are so good for your eyes. 


Sources

P.S.
There is another theory about why we cannot see the colours. Ask me about it on your next tour with Creative Vacations.

Wednesday, 14 February 2018

Panoramas: Lightroom Trouble and Solution

Last post I talked about Lightroom giving me warped images and how to fix it.

Here are photos that shows the whole process.
See last post for how to create panoramas in Lightroom.

First try: Lightroom gives me a panorama that is completely warped. It looks like it's beyond repair.


Tuesday, 9 January 2018

Panorama - one hack at the time


In frustration over not having a wide enough lens to capture the Aurora, I started doing panorama photography. 


The 14mm lens was not wide enough and, the fish-eye lens was too distorted. So in an attempt to solve this problem, I started doing panorama stitching. The newest version of Adobe Lightroom had made it possible to do panorama stitching and, still be working on RAW images. (There will be more on stitching in Lightroom later in this post)
How to do it in Lightroom is explained here: https://youtu.be/xR1qL68nAJM


Panoramas are photos that are wide. The hight/width ratio is often 1/3. There are no rules. They just have to have a hight/width ratio that is wider than a standard photo frame. The angle of view is often wider than most images. 120 to 140 or, even 180 degrees or more are common. 


Although I was very much intrigued by the panorama format when I was a young photographer I haven’t done very much panorama work. I did a project where I collaborated with dancers and made a sort of panorama. (This was done when we used film in the camera and, printed in the darkroom. I haven’t digitalized these images.) I used to dream about owning a Linhof or a Fuji 6X17 roll film camera, or even a Horizon 35mm camera. However my budget never allowed me to get them so I just forgot about it. Until last year. 

The panorama is a very nice format. It resembles the way we humans see with our eyes. It is also a great problem solver. A photo-technical hack. 


Friday, 29 January 2016

34 things you need to know about dressing for the cold (or 8 if you're in a hurry)


Short Version

  1. Dress in layers - many layers - 3 or more.
  2. Wool closest to your body.
  3. All the layers have to be loose.
  4. Change your woolen socks frequently. 
  5. Warm hat and warm boots.
  6. Mittens, not gloves.
  7. Use hand and feet warmers if you need. 
  8. Be nice to the planet and the animals on it. 

Full version

1) 
Three layers is the basic for dressing in the cold.
The three layers are:

  1. a thin layer next to your skin, called underwear. 
  2. an insulating layer, thicker than the first layer.
  3. an outside layer that protects against wind, rain and snow.

Sunday, 20 December 2015

Creativity on a Cloudy Night

Tonight was very very cloudy. Luckily for me it was my night off. My good colleagues drove far far away and found the Aurora behind the clouds. We did a little Christmas shopping, and a little Christmas cleaning and it was when I was outside doing a little Christmas snow shovelling that I saw the motiv of tonight.


 The wind had stopped, the rain had stopped. Everything was quiet. And monochrome.
I could not resist being a little creative. Aurora is not the only motiv that exist at night. Beauty is everywhere.

Sunday, 8 March 2015

One Night, Four Photographs, Four Settings: White Balance and Aurora Borealis Photography

What is the correct white balance for Aurora photography?

Like almost all answers to questions about photography it starts with "It depends."
First of all there is hardly any such thing as "correct white balance" in any photograph. It is an esthetic choice. What do you want to communicate? What kind of mood do you want? and, what feels right to you? Two photographers may very well interpret the same situation and scene differently. To learn more about white balance visit this article on how to get it right.

2 things I go for 

1 - I want the photograph to look close to what I saw in the nature.
2 - I want the photograph to feel as how I felt it. In the winter that mostly means "cold."

The night it got complicated

Saturday March 7, things got more complicated than usual. 
My normal standards are  4000 Kelvin in moonlight, and 3200 Kelvin on nights without moonlight. Or tungsten/incandescent setting for no moon, and fluorescent setting for moonlight.  

Now that we have reached March the days are much longer than January and February. That means that in the beginning of the night there is still a lot of daylight. The sun sat at 17:08 that night. But, here in the north the sun sets at such an angle that it takes a long time from it sets until it gets really dark. Astro twilight lasted until 20:37 that night. So when we got out of the studio at 19:00 it was still twilight. There was also another type of light: Northern Light. The photo below is shot from the field across the road from the studio on Håkøya.
Aurora showing up early at night, late in the season. Photo taken at 19:05.
The white balance settings are very different from twilight to night. The twilight is also called "The blue hour."